Sunday 19 April 2015

How to install Counter-Strike 1.6

How to install Counter-Strike 1.6

Many friends ask me “How to install Counter-Strike?” and “What are system requirements for installing Counter-Strike?
So, I am writing a step by step tutorial on installing Counter-Strike 1.6 on a Windows based computer.

System Requirements:
The minimum requirements for running Counter-Strike 1.6 are a 500Mhz Processor, 96MB RAM, 16MB video card and around 512MB of free disk space.
However, the specifications for a smooth gameplay would be an Intel Core i3 Processor, 2GB RAM, 1GB video card and around 2GB of free disk space.
For superb results, I recommend the following system specifications:
Processor: Intel Core i7
RAM: at least 4GB
Video Card: at least 2GB *
Hard Disk: at least 4GB free space **
* NVIDIA GeForce GTX 560 would be great
** Enough for lots of maps and cached files

Installation:
These installation steps are tested on Windows XP/2003/7/8

Download Cs1.6v7_bySniper.zip
Extract all files from zip file in any folder.
Run Cs1.6v7_bySniper.exe.
Run cs16patch_full_V21.exe .
In case you get file missing errors during the setup, just ignore them!
Press next on each step until the setup is completed.

A shortcut named “Counter-Strike 1.6” would be created on your desktop once the game is successfully installed.

Enjoy playing Counter-Strike 1.6 :)

PS: If you get any errors following the above steps, please comment below and I will try to find a solution!
Regards,
TZ
 

How to setup Counter-Strike 1.6 Server

How to setup Counter-Strike 1.6 Server

Requirements
  1. Computer
    You can setup Counter-Strike 1.6 Server on any computer.
    This tutorial is for computers running Windows Operating System (Windows XP / Windows Server 2003 / Windows 7)

  2. Internet Connection
    For Online Server, an Internet Connection is required.
    This tutorial is for home computers running on DSL Connection or WiMAX connection.
    For 16 slots server, a 1Mb internet connection is sufficient.
    For best performance, a 4Mb internet connection is preferred which can support upto 32 players.

  3. Static IP
    The Public IP address of dsl connections is Dynamic.
    Which means on every restart of router the Public IP is changed.
    To make the IP static you have to request your DSL provider to provide you a Static IP address.
    PTCL users can get Static IP easily for a monthly charge of 200 rupees.
    Call 1218 from your ptcl number to get a Static IP on your dsl connection.

  4. UPS
    To make your server 24/7 your computer must stay on all the times.
    For that you will need a UPS that will provide backup in case of power outages.


Installation Steps
  1. Download Server
    Download Dedicated Server Setup from here HLDs_BySniper.zip
    Extract the zip file to any folder.

  2. Server Configuration
    Open server.cfg file in cstrike folder and change “CS 1.6 Server by CounterStrike.Com.Pk” to server name of your choice.
    Right-Click on START_SERVER.bat file and click Edit.
    Make any required changes and save the files by pressing Ctrl + s
    Now Double-Click on START_SERVER.bat
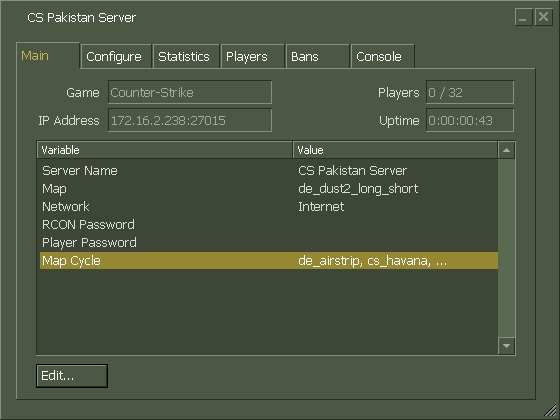
    If everything goes fine, the server console will be started like below.
  3. hlds

  4. Testing
    This step is just to make sure that you have properly configured the server.
    Open your game and click on Add Server.
    Enter your Private IP with Port and click Add.
    If you can see your server running, you can proceed to the next step.

  5. Open Firewall
    Now you have to open your Windows Firewall so that other people can connect to your server.
    You need to open UDP port 27015 on your windows firewall.
    Follow steps on this link to open Windows Firewall ports:
    http://windows.microsoft.com/en-us/windows/open-port-windows-firewall
    At this stage, you have created a LAN server which means people connected to your Router can now join your server.

  6. Port Forwarding
    Now you have to “Forward the ports from your Router to your Computer” so that Online Players can connect to your server.
    In simple words, all the people connecting to your Router on port 27015 will be forwarded to the port 27015 of your Computer.
    There are hundreds of thousands of router models with different port forwading methods each.
    Here are steps for some routers:
    http://www.counterstrike.com.pk/2014/03/port-forwarding-on-dsl-modem-router/
    For other routers, just google about it and you will find the steps.

  7. Testing
    This step is to make sure the firewall and ports are properly opened.
    Send your Public IP to your frind and ask him to join your server (182.180.66.151:27015)
    To find your Public IP, visit this link : http://myip.counterstrike.com.pk/
    whatismyip
    Now you have created an Online Server which means people from all around the world can join your server.


Thanks to Muhammad Ather, Saud Irfan for their help and Sohaib for the latest HLDS setup!

Note:
If you are getting “Unable to initialize Steam” error, please read details on below link to resolve the issue: Unable to Initialize Steam Error Fix

Having problems? Just comment below and we will find you a solution!


Port Forwarding on DSL Modem / Router

Port Forwarding on DSL Modem / Router

hese steps are for FiberHome AN1020-25 ADSL Wireless Modem provided by PTCL Broadband.

Open http://192.168.1.1/ in your Web Browser.
A dialog will appear asking for Username and Password.
Enter admin in both Username and Password.
If the Username and Password are correct, you will see a page like below:
home


Now, click on “Advanced Setup” and then click on “NAT“:
nat

Click on “Add” and enter the Local IP and Port you want to forward.
Here I am forwarding Port Number 27015 of UDP which is default port for Counter-Strike 1.6 Server.
This port is being forwarded to my computer’s IP which is 192.168.1.2
virtual
In case you are setting up a Web Server like WAMP/XAMPP, the default HTTP Port Number is 80 of TCP
Click “Save/Apply”.
Your port should be forwarded successfully now!


How To Record Game Demo In Counter Strike 1.6

How To Record Game Demo In Counter Strike 1.6

Ever wondered how people record videos of their game play in Counter Strike 1.6?
Do they use Screen Recorder Software or Cell Phones to record those videos?
The answer is, No!


Counter Strike 1.6 developers have added this awesome feature called Demo Recording built-in the game.
With This feature you can record videos of your CS 1.6 game without using any additional third party software!
It is not limited to recording your own game but it can also be used to record demo of other players while you are Spectating them.


Procedure:
The procedure is very easy. Follow the steps below:
Recording Demo:
  • Make sure you are in any Server
  • Open your Game Console. (Press the key labelled ~ or ` just below the Esc key in the upper left corner of your keyboard!)
  • When you want to start recording the demo, type record demo123 in the bottom line and press Enter. Here demo123 is the Demo Name. Demo Name can be anything you imagine. Do not add spaces in Demo Name. Demo starts recording once you press Enter and close the Game Console!
  • Counter Strike 1.6 Console Demo Recording
  • When you want to stop recording, open game console, type stop and press Enter. The demo recording will be instantly stopped!
  • Congrats! The demo has been recorded and saved on your computer.
  • Now close the game and goto your cstrike folder. In Windows 7 & 8, cstrike folder is located at C:\Program Files (x86)\Valve\cstrike while in Windows XP and older Windows versions, cstrike folder is present at C:\Program Files\Valve\cstrike
  • In some cases, the file is present in C:\Users\USERNAME\AppData\Local\VirtualStore\Program Files\Counter-Strike 1.6\cstrike
  • The Demo file demo123.dem will be placed inside the cstrike folder.
    Counter Strike 1.6 Demo File In CStrike Folder
  • If you want to share this file on Facebook or Email it, don’t forget to Compress it using Zipped Folder!

Playing Demo:
  • Copy the Demo File to your cstrike folder (If its not already there!)
  • Run Counter Strike 1.6
  • Open the Game Console and type playdemo demo123
  • Demo will starting playing.
  • If you want to catch cheaters, type demoui2; sv_cheats 1; r_drawothermodels 2 in game console while the demo is playing. Watch their game closely for any suspicious moves!
  • Some players are using the Hearing technique to know about an approaching enemy so make sure you distinguish them from the actual cheaters :)

Demo Recording is most commonly used by Admins and Normal Players to record the game play of cheaters as a Proof-of-Cheat (PoC)
This feature can also be used to record your own game when you are about to perform those cool stunts in game.
Some people use it as an alternative to Screen Shots when people blame them for Photoshoped Screen Shots ;)


If you have any questions, feel free to ask in comments!


Securing Counter Strike 1.6 Server Against RCON Hack Attacks

Securing Counter Strike 1.6 Server Against RCON Hack Attacks

Now a days, many game server owners complain about their servers getting hacked.
No matter how much strong RCON password you choose, your server can still be hacked.
Antivirus Protections and Firewalls are of no use in this case!


Symptoms:
If you own a Counter Strike 1.6 Server, you should have faced weird problems like:
  • Your server’s name getting changed.
  • All your players getting redirected to some strange servers.
  • RCON Password getting changed.
  • Strange admins appearing in your admin list.
  • Strange plugins running on your server.
If you find any of the above symptoms, it means your server is insecure!


Problem A:
  • The most commonly used technique to hack a server is by hacking any of the Server Admins
  • If someone knows the password of any admin having Full Access Flags, they can hack your server (They will be able to change your RCON Password, Server Name, Password Protect it, Make Admins, etc)
  • This happens when your admins visits the server of the hacker
  • Remember that the value of _pw variable is visible to the Server Owner (Will cover that in an other post)
  • Another way is by hacking the computer of server admin using a RAT or simple keyloggers.

Solution / Fix
To prevent your server from being hacked, never ever give full access flags to the admins. Only give acdeijuvw Access Flags and tell your admins to follow below rules strictly:
  • Don’t player in random servers or before joining other servers, change your password by writing setinfo _pw ANYTHING in game console.
  • Never ever share your admin password with anyone. No matter know much you trust that person.
  • Never ever run Files or Links that unknown people send you online, there is a good chance they will Steal All Your Online Passwords.
  • If you suspect that someone else is using your password, change it immediately and inform the server owner.
  • If you failed to follow the above rules, you will lose your admin powers!
  • Keep the above rules in mind and no one will be able to hack your password :)

  • Problem B:
    • In Counter Strike 1.6 (and possibly in other valve based games too), there is a feature which allows a player to upload files on the server. For example, in CS1.6 players can upload their Custom Spray Logos on the server.
    • Imagine if some player uploads a server.cfg file instead of the Spray Logo? All of your server configurations will be replaced by configurations of their choice! Now your server belongs to them! They can do what ever they want with your server.
    • Exploiting this bug, a tool named Raiz0 was released to automate the whole process.
    • Bad guys are using that tool (in combination with network scanning tools) to hack large number of servers daily.

    Solution / Fix
    The fix to this vulnerability is fairly simple. Most of the famous servers are already patched! Below are the steps for Windows bases servers:
    • You have to change the permissions of cstrike/addons/amxmodx/configs folder.
    • Counter Strike 1.6 Configs Folder
    • Goto the cstrike/addons/amxmodx folder, right click on configs folder and click on properties.
    • Counter Strike 1.6 Advanced Properties
    • In the Security Tab, click on Advanced, a new dialog will appear, click on Add, type in Administrators and click Ok.
    • A new dialog will appear. Tick the Deny check boxes in front of Create Files/Write Data and Create Folders/Append Data. Then click Ok.
    • Counter Strike 1.6 Advanced Permissions
    • Tick both the check boxes in Advanced Security Settings dialog. Click Ok. And again click Ok.
    • Counter Strike 1.6 Advanced Security
    • Now your server is secure from Raiz0 hack attacks :)

    If you have any questions please feel free to ask in comments!


Fix Raiz0 Fake Player Spammer, Flooder and Server Crasher Exploit

Fix Raiz0 Fake Player Spammer, Flooder and Server Crasher Exploit

If you are active in Counter Strike 1.6 Servers these days, you might have noticed a new type of crashing exploit that is being used in wild to crash cs 1.6 servers.
This is a new crashing technique which exploits an Input Validation vulnerability in Counter Strike 1.6 Steam Engine.
Usually you will see multiple players joining with names like #Cstrike_GIGIN_Label or other similar looking nicknmes.
Upon successful exploitation, game of all the players connected to that server is crashed!
To automate the process, Raiz0 has created a tool that sends crafted data packets to target server causing fake player flood in server and as a result all players are crashed or they leave the server due to lag.

How to Fix: (Updated on 16th Feburary, 2015)
To fix the problem, you have to update your Dproto to the latest version.
Download latest Dproto 0.9.524 Version from here.

How to Fix Fatal Error Available memory less than 15MB

How to Fix Fatal Error Available memory less than 15MB

Recently a friend of mine installed Counter Strike 1.6 on his Windows 7 64-bit Operating System.
The game installed properly but when he tried to launch the game from desktop shortcut icon, an error message popped up saying Available memory less than 15MB!!! with title Fatal Error.
Counter Strike 1.6 Fatal Error 15 MB
Well this was funny because his laptop had 6 Gigs of RAM and according to Resource Monitor, only 30% of the RAM was being used (20% being used by Google Chrome alone!)
Counter Strike 1.6 System RAM CPU Details
The solution to this mysterious problem was simpler than we thought.
Follow the steps below to fix this issue:
  • Right-Click on Counter Strike 1.6 Game Icon and Click Properties
  • Counter Strike 1.6 Shortcut Properties
  • Select Compatibility tab in the new window that appears.
  • Tick Run this program in compatibility mode for and Choose Windows XP (Service Pack 3)
  • Counter Strike 1.6 Compatibility Mode Windows XP
  • Click Ok
That’s all. Available memory less than 15MB error is now fixed and you can enjoy the game.
If you still can’t fix this error, comment below with your Operating System and from where you downloaded the HLDS Setup!
If you are looking for Counter Strike 1.6 Setup Download link, get it from here: Download Counter Strike 1.6 Game Setup


Wie Fatal Error Der verfügbare Speicher weniger als 15 MB Fix
Cum la spre Fix Fatal Error memorie disponibilă mai puțin de 15MB
Како да го надминете Фатална Грешка меморија помалку од 15MB


How to setup TeamSpeak Client on Windows

In case you don’t know what TeamSpeak is, its basically a software which allows many people to communicate with each other simultaneously.
TeamSpeak3 Logo

Just like you make conference calls on mobile phone or group calls on Skype.
The only difference is that TeamSpeak uses a central server to which all other people are connected.
TeamSpeak Architecture
Unlike other VoIP (Voice over IP) software, TeamSpeak is build especially for gamers.
Server managers can create accounts for users, set permissions, block users, setup groups and lots of other exciting features that Skype and other software don’t provide.

System Requirements:
TeamSpeak has no Hi-Fi requirements, all you need is a computer system with Windows 2K3/XP/7/8 and a smooth internet connection.

Installation:
The latest version of TeamSpeak as of 3rd March,2015 is 3.0.16
Download TeamSpeak installer from the following links:
For x86 Systems (32-Bit Architecture)
For x64 Systems (64-Bit Architecture)

To check your computer’s architecture, follow these steps:
Click on Start Menu.
Right-click on Computer and click on Properties.
TeamSpeak Start Menu

A new window will open showing you the computer details like this:
TeamSpeak Architecture

Once you have downloaded the installer, run it by double-clicking and follow the steps below:
TeamSpeak3 Install Step 1
Click Next


TeamSpeak3 Install Step 2
Click I Agree


TeamSpeak3 Install Step 3
Click Next


TeamSpeak3 Install Step 4
Click Next


TeamSpeak3 Install Step 5
Click Next


TeamSpeak3 Install Step 6
Click Next


TeamSpeak3 Install Step 7
Click Install


TeamSpeak3 Install Step 8
Click Finish


Connect with TeamSpeak Server:
To connect with TeamSpeak Server, enter the IP of TeamSpeak Server and click Connect.
TeamSpeak3 Main Screen


Installation Problems:
I you face any problems while installing TeamSpeak3 Client on your Windows Operating System, just write in comments. We will find a solution and update this post!


How to setup TeamSpeak Server on Linux

How to setup TeamSpeak Server on Linux

If you don’t know what TeamSpeak is, its basically a Voice Chat application. Read more details here: TeamSpeak Details

Installing TeamSpeak Client is pretty easy however setting up TeamSpeak Server requires some technical knowledge.

Requirements
  1. VPS
    You must have a Virtual Private Server for this setup.
    This installation is tested on CentOS 32bit Linux Server.
    Buy a VPS with at least 512 RAM from any VPS sellers online.
    Once purchased, you will be given an IP address, Username/Login and Password for your VPS.
    Note: TeamSpeak Server can also be installed on DSL connections but it is not preferred.

  2. Root Access
    Installing programs on Linux require root privileges.
    Root account in Linux is same as the Administrator account in Windows.
    Root user has complete control of the VPS.

  3. Linux Commands Knowledge
    Basic knowledge of Linux command-line is required.
    Linux commands are very very powerful which means a mistake of even a single character can delete all your files completely!
    Also, there is no Recycle Bin or Trash in Linux which means the chances of recovery are nearly impossible.
    So make sure you know what the command does before executing it on VPS.


Installation Steps
  1. Download PuTTY
    If you are using Windows, you will need an SSH Client like PuTTY that lets you connect with your VPS.
    Download PuTTY from here PuTTY.exe

  2. Login to VPS
    Once you have downloaded PuTTY, open it and you will see the screen below:
    PuTTY SSH Client Console Window
    Enter your VPS IP address in Host Name field and press enter.
    A black console window will open asking for the username.
    Enter your username (which should be root) and press enter.

    Now it will ask for your password like below:
    PuTTY SSH Client Console Window
    Enter your password and press enter.
    Note that your password will not be shown as you type it so don’t get confused.

    Once you have logged in, you will see something like below:
    PuTTY SSH Client Console Window

  3. Server Installation
    Write the following commands in PuTTY console one-by-one:
    groupadd teamspeak
    useradd -g teamspeak teamspeak -s /sbin/nologin
    cd /home/teamspeak
    wget http://dl.4players.de/ts/releases/3.0.11.1/teamspeak3-server_linux-x86-3.0.11.1.tar.gz
    tar -zxvf teamspeak3-server_linux-x86-3.0.11.1.tar.gz
    chgrp -R teamspeak /home/teamspeak
    chown -R teamspeak /home/teamspeak
    screen -A -m -d -S ts3 su -c "./ts3server_startscript.sh start" teamspeak -s /bin/sh

    After you have executed all the commands without getting any errors, the TeamSpeak Server should be started successfully in background.

  4. Start TeamSpeak Server on Startup
    TeamSpeak Server does not automatically starts when your VPS is restarted.
    To start the server automatically on startup, execute the following commands:
    echo cd /home/teamspeak >> /etc/rc.local
    echo screen -A -m -d -S ts3 su -c "./ts3server_startscript.sh start" teamspeak -s /bin/sh >> /etc/rc.local

    Now your TeamSpeak server will automatically startup after crash or reboot.
  5. To make sure everything is running fine, connect to your newly setup TeamSpeak Server by download TeamSpeak Client from here TeamSpeak Client for Windows

    Installation Problems:
    If you face any problems while setting up TeamSpeak Server on your VPS, just write in comments. We will find a solution and update this post!


Securing Counter Strike 1.6 Server Against RCON Hack Attacks

Securing Counter Strike 1.6 Server Against RCON Hack Attacks

Now a days, many game server owners complain about their servers getting hacked.
No matter how much strong RCON password you choose, your server can still be hacked.
Antivirus Protections and Firewalls are of no use in this case!


Symptoms:
If you own a Counter Strike 1.6 Server, you should have faced weird problems like:
  • Your server’s name getting changed.
  • All your players getting redirected to some strange servers.
  • RCON Password getting changed.
  • Strange admins appearing in your admin list.
  • Strange plugins running on your server.
If you find any of the above symptoms, it means your server is insecure!


Problem A:
  • The most commonly used technique to hack a server is by hacking any of the Server Admins
  • If someone knows the password of any admin having Full Access Flags, they can hack your server (They will be able to change your RCON Password, Server Name, Password Protect it, Make Admins, etc)
  • This happens when your admins visits the server of the hacker
  • Remember that the value of _pw variable is visible to the Server Owner (Will cover that in an other post)
  • Another way is by hacking the computer of server admin using a RAT or simple keyloggers.

Solution / Fix
To prevent your server from being hacked, never ever give full access flags to the admins. Only give acdeijuvw Access Flags and tell your admins to follow below rules strictly:
  • Don’t player in random servers or before joining other servers, change your password by writing setinfo _pw ANYTHING in game console.
  • Never ever share your admin password with anyone. No matter know much you trust that person.
  • Never ever run Files or Links that unknown people send you online, there is a good chance they will Steal All Your Online Passwords.
  • If you suspect that someone else is using your password, change it immediately and inform the server owner.
  • If you failed to follow the above rules, you will lose your admin powers!
  • Keep the above rules in mind and no one will be able to hack your password :)

  • Problem B:
    • In Counter Strike 1.6 (and possibly in other valve based games too), there is a feature which allows a player to upload files on the server. For example, in CS1.6 players can upload their Custom Spray Logos on the server.
    • Imagine if some player uploads a server.cfg file instead of the Spray Logo? All of your server configurations will be replaced by configurations of their choice! Now your server belongs to them! They can do what ever they want with your server.
    • Exploiting this bug, a tool named Raiz0 was released to automate the whole process.
    • Bad guys are using that tool (in combination with network scanning tools) to hack large number of servers daily.

    Solution / Fix
    The fix to this vulnerability is fairly simple. Most of the famous servers are already patched! Below are the steps for Windows bases servers:
    • You have to change the permissions of cstrike/addons/amxmodx/configs folder.
    • Counter Strike 1.6 Configs Folder
    • Goto the cstrike/addons/amxmodx folder, right click on configs folder and click on properties.
    • Counter Strike 1.6 Advanced Properties
    • In the Security Tab, click on Advanced, a new dialog will appear, click on Add, type in Administrators and click Ok.
    • A new dialog will appear. Tick the Deny check boxes in front of Create Files/Write Data and Create Folders/Append Data. Then click Ok.
    • Counter Strike 1.6 Advanced Permissions
    • Tick both the check boxes in Advanced Security Settings dialog. Click Ok. And again click Ok.
    • Counter Strike 1.6 Advanced Security
    • Now your server is secure from Raiz0 hack attacks :)

    If you have any questions please feel free to ask in comments!


How to Fix Unable to initialize Steam Error in Counter Strike 1.6 Server

How to Fix Unable to initialize Steam Error in Counter Strike 1.6 Server


Unable to initialize steam error in Counter Strike 1.6
Many people have reported that after they setup HLDS (Half-Life Dedicated Server) or Counter Strike 1.6 Server, they get an error saying “Unable to initialize Steam“.
From what I understand, this error pops up because of permission issues in Windows 7 and Windows 8 (One of the reasons why I hate Windows 7/8)
But there’s nothing to worry about, the fix is really simple.
Follow the steps below to fix this issue:
  • Open Notepad
  • Copy and Paste the following text in Notepad (or Download StartServer.bat)
    @echo off
    cls
    title HLDS - CounterStrike.Com.PK
    :hs
    echo (%time%) Server Started..
    reg add "HKCU\Software\Valve\Steam\ActiveProcess" /v SteamClientDll /t REG_SZ /d "" /f
    start /wait hlds.exe -console -game cstrike -master -noipx +map de_dust2 +maxplayers 32 +port 27015
    echo n| goto hs
    echo (%time%) Server Crashed, restarting..
    goto hs
  • Save the file as StartServer.bat
    Make sure “All Files (*.*)” is selected in “Save as type:
    Counter Strike 1.6 Start Server Batch File
  • Run StartServer.bat
Edit the StartServer.bat file as per your requirements.
That’s all. “Unable to initialize Steam” error is now gone for good!
If you still can’t fix this error, comment below with your Operating System and from where you downloaded the HLDS Setup!
If you are looking for Counter Strike 1.6 Server Setup Download link, get it from here: Download Counter Strike 1.6 Server Setup


Wie Fix Kann Dampf Fehler in Counter Strike 1.6 Server zu initialisieren
Cum la spre Fix Nu pot inițializa Eroare Steam Counter Strike 1.6 Server
Како да го надминете Не можам да иницијализирам пареа Грешка во Counter Strike 1.6 Сервер

How to setup Counter-Strike 1.6 Server

How to setup Counter-Strike 1.6 Server


Requirements
  1. Computer
    You can setup Counter-Strike 1.6 Server on any computer.
    This tutorial is for computers running Windows Operating System (Windows XP / Windows Server 2003 / Windows 7)

  2. Internet Connection
    For Online Server, an Internet Connection is required.
    This tutorial is for home computers running on DSL Connection or WiMAX connection.
    For 16 slots server, a 1Mb internet connection is sufficient.
    For best performance, a 4Mb internet connection is preferred which can support upto 32 players.

  3. Static IP
    The Public IP address of dsl connections is Dynamic.
    Which means on every restart of router the Public IP is changed.
    To make the IP static you have to request your DSL provider to provide you a Static IP address.
    PTCL users can get Static IP easily for a monthly charge of 200 rupees.
    Call 1218 from your ptcl number to get a Static IP on your dsl connection.

  4. UPS
    To make your server 24/7 your computer must stay on all the times.
    For that you will need a UPS that will provide backup in case of power outages.


Installation Steps
  1. Download Server
    Download Dedicated Server Setup from here hlds_cspak.zip
    Extract the zip file to any folder.

  2. Server Configuration
    Open server.cfg file in cstrike folder and change “CS 1.6 Server by CounterStrike.Com.Pk” to server name of your choice.
    Right-Click on START_SERVER.bat file and click Edit.
    Make any required changes and save the files by pressing Ctrl + s
    Now Double-Click on START_SERVER.bat
    If everything goes fine, the server console will be started like below.
  3. hlds

  4. Testing
    This step is just to make sure that you have properly configured the server.
    Open your game and click on Add Server.
    Enter your Private IP with Port and click Add.
    If you can see your server running, you can proceed to the next step.

  5. Open Firewall
    Now you have to open your Windows Firewall so that other people can connect to your server.
    You need to open UDP port 27015 on your windows firewall.
    Follow steps on this link to open Windows Firewall ports:
    http://windows.microsoft.com/en-us/windows/open-port-windows-firewall
    At this stage, you have created a LAN server which means people connected to your Router can now join your server.

  6. Port Forwarding
    Now you have to “Forward the ports from your Router to your Computer” so that Online Players can connect to your server.
    In simple words, all the people connecting to your Router on port 27015 will be forwarded to the port 27015 of your Computer.
    There are hundreds of thousands of router models with different port forwading methods each.
    Here are steps for some routers:
    http://www.counterstrike.com.pk/2014/03/port-forwarding-on-dsl-modem-router/
    For other routers, just google about it and you will find the steps.

  7. Testing
    This step is to make sure the firewall and ports are properly opened.
    Send your Public IP to your frind and ask him to join your server (182.180.66.151:27015)
    To find your Public IP, visit this link : http://myip.counterstrike.com.pk/
    whatismyip
    Now you have created an Online Server which means people from all around the world can join your server.


Thanks to Muhammad Ather, Saud Irfan for their help and Sohaib for the latest HLDS setup!

Note:
If you are getting “Unable to initialize Steam” error, please read details on below link to resolve the issue: Unable to Initialize Steam Error Fix

Having problems? Just comment below and we will find you a solution!

Counter Strike 1.6 Servers In Pakistan

Counter Strike 1.6 Servers In Pakistan

Here is a list of Counter-Strike 1.6 Servers in Pakistan.
Most of them are hosted in Pakistan while others are hosted elsewhere on VPS or Dedicated Servers.
If any Pakistani Server is missing in this list or you want your CS 1.6 Server added, please feel free to post your Server’s Name and Public IP Address in comments.
To find your Public IP Address, visit this link: My IP Address

  • Brothers ||GAMMING|| Server By $N!P3R 182.184.109.36:27015
  • ZIA INFERNO SERVER 110.93.216.206:27015
  • CS Pakistan Server 182.180.66.151:27015
  • CS Pakistan Zombie Server 182.180.66.151:27016
  • CS Pakistan SandBox Server 37.157.250.12:27015
  • Demolished Era [sXe Injected] 121.52.154.183:27015
  • .::ExtremE Alfa::. 193.192.58.189:27048
  • AtankWadi Clanwar 182.184.31.199:27040
  • Best CS 1.6 Server + No Lag 182.184.108.41:27016
  • NS Community <3 | Public 176.57.188.43:27020
  • J I N’s Pak Gamerz 193.192.58.34:27026
  • !nN0c3nT’x s3rV3r :) 59.103.165.124:27015
  • WarZone | Death Match [dd2] 176.57.188.44:27020
  • BaLOcH afk_6Killer 193.192.59.233:27047
  • NS Community <3| BaseBuilder 176.57.188.44:27023
  • BaLOcH PubliC SerVer 193.192.59.233:27050
  • NS Community <3 | Clanwar 176.57.188.43:27021
  • Newworld Gaming Server 175.107.255.251:27015
  • BaLOcH CLaN War 193.192.59.233:27051
  • Dreamnet Match Server 103.24.96.98:27015
  • Shooters # Public SERVER 59.103.159.162:27016
  • Assasin Community | AFK MAPS 85.25.216.247:27168
  • Assasin Community | CLASSIC 85.25.216.248:27141
  • <3 NеwLȋfe <3 © |Ῥυвʟιc Șᴇʀνεя [sӼe-Injected] 182.188.43.126:27042
  • <3 NеwLȋfe <3 © |Ҋоямᴀʟ Șᴇʀνεя [sӼe-Injected] 182.188.43.126:27017
  • Reality Gaming 111.88.52.132:27016